
Many of our customers want the best audio/video experience possible. To get the most out of a system, we need to control every aspect of the room to maximize the experience. The best way to do this is with a space designated for a private cinema.
Don’t let the simple aesthetic of the final product fool you, there is a lot of thought that goes into designing a private theater. Our engineering and obsessive attention to detail help deliver a theater experience surpassing some of the world’s best public theaters.
Determining the Space
With a traditional TV setup, we install a TV around the constraints of the space. This comes with inherit compromises: glare from natural light, TV mounted high above the fireplace and undesirable audio reflections. With a dedicated theater, the room is designed around the theater setup. The sound system, projection system, room acoustics and seating are all planned cohesively. The space is engineered to minimize audio reflections and gives us maximum control over the light in the room. There are still constraints even with a dedicated theater, such as the size and shape. Thankfully, even these minimal constraints can be more easily mitigated when the room is designed around your theater experience.
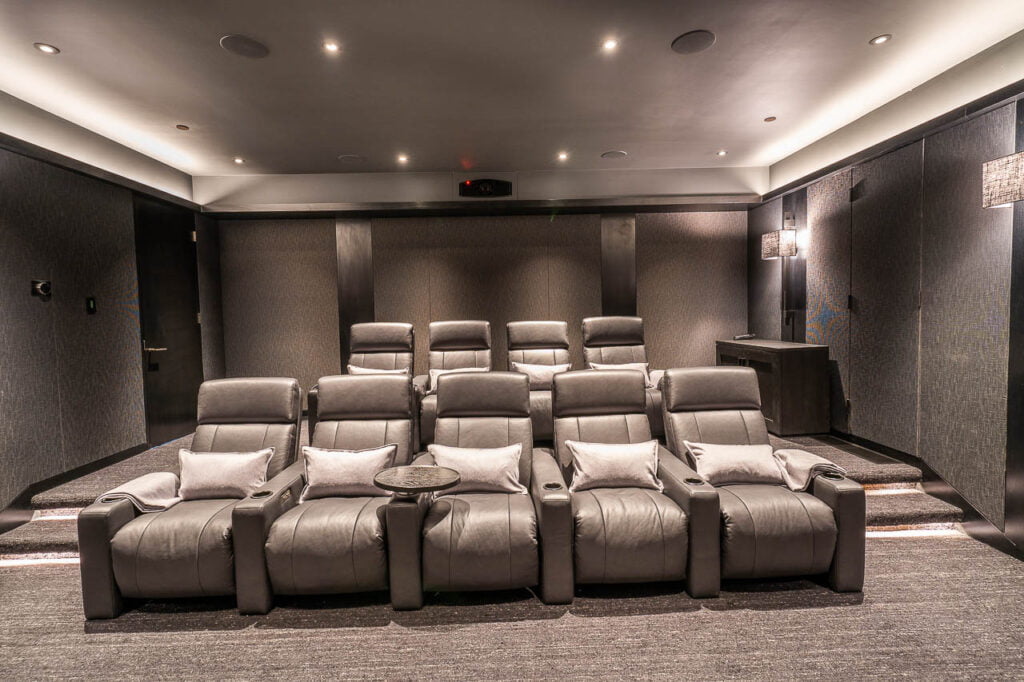
When designing a room, our primary goal is to ensure there is enough space to seat everyone and that the room isn’t a cube. A cube exacerbates undesirable sound wave bouncing and is difficult to control. The sound is more easily controlled when the height, width, and depth are all different dimensions.
Managing Sound:
Getting the audio to sound just right is one of the most challenging parts of the build. We want to make sure that the only noise you can hear comes from whatever content is being watched, so we want to make the noise floor as low as possible. (Unfortunately, homes can be noisy places!)
Lowering the Noise Floor:
The noise floor is the volume of ambient sound in a room. The noise floor can be raised by wind, noise bleeding through walls from other rooms, fans from equipment and even things as quiet as your HVAC system. The lower the noise floor, the better you can hear the quieter parts of a movie (and there are fewer distractions pulling the viewer out of the moment).
To minimize the noise floor, we have to isolate the room from these undesirable sounds. That means tons of soundproofing on every wall and even the ceiling if there’s a floor above the theater. Even the light back boxes need a soundproof enclosure to seal them off from outside the room. Failing to Soundproof every part of the room defeats the entire purpose. Soundproofing is only as strong as the weakest part.
The next piece is minimizing the sounds of anything in the room. The HVAC system has to come into consideration. The angle the air comes in, the size of the opening, how close the vent is to the wall, and the velocity of the air all come into play with how loud the system is. We design the dedicated theater HVAC system to minimize these sounds.
The final piece to consider when lowering the noise floor is the A/V equipment. A lot of warm equipment requires adding fans that make noise. Some equipment makes some noise just while running and being on. These items would raise the noise floor. Whenever possible, we relocate all the equipment to a centralized rack so that no equipment in the room generates noise.
Engineered Speaker Layout:
With a low noise floor, the only thing left to pump in audio is the sound system. We digitally recreate the space and run audio simulations to determine the best speaker placement and angles when given the seating height, the viewer’s distance from the speakers, and the room’s shape. These simulations help us minimize undesirable sound reflections, standing sound waves, and instructive or destructive interference.

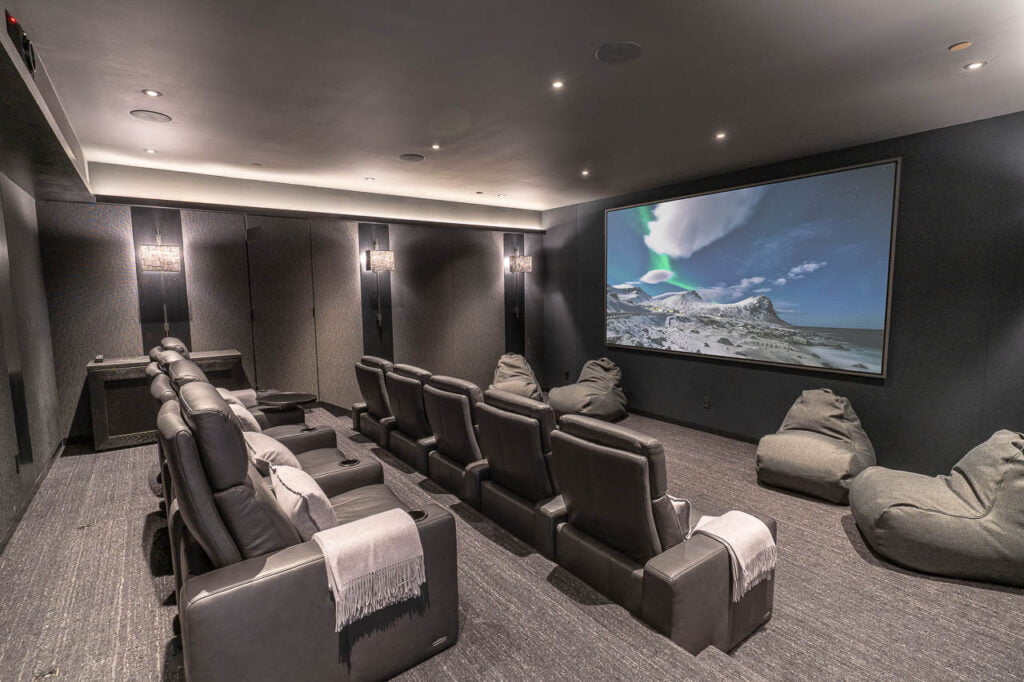
In the front, we put three speakers for a front left, front center and front right speaker. Then on the sides of the seating area we have a surround left and right channel. If there are multiple rows of seating, each row gets its own independent left and right channel for the most optimal audio experience. In the back, we have a rear left and rear right channel. Then we add a few strategically placed subwoofers to fill the room with bass. Having speakers in front, behind and on the sides allow sounds to be placed throughout the room just as the film maker intended.
It doesn’t end there either! Although a traditional surround sound system allows sounds to be placed forward, backward and side to side, there’s no height. So the final part of the system is to put speakers in the ceiling. These ceiling-mounted Dolby Atmos speakers allow sound to change in height. Then we calibrate the system by putting multiple microphones in the finished room. The system measures the time it takes for sound to travel from all the speakers to help it understand how to make sounds feel in front, behind, above or below the viewer.
For example, let’s say the system wants to make a sound come from the front left of the viewer. The system would play the front speaker at 80% volume in the front, 30% in the rear, 70% on the left, and 20% on the right. When SoundVision calibrates your dedicated theater, your equipment will do this automatically in real-time! If you have never heard a dedicated theater in person, you should come to our showroom and experience it yourself!
The Ultimate Viewing Experience:
The viewing experience is more straightforward than the audio system but just as important. The viewing experience has three main parts: The screen, the screen size and the projector.
It’s easy to overlook the importance of a quality screen. With a private theater, the only decision to be made is if you want an acoustically transparent screen. Acoustical transparency allows sound to pass through the screen. In almost all instances, this is the screen of choice. This allows us to put a front center channel at the optimal height behind the screen.

Another aspect is the screen size and mounting position. Many people would like to believe bigger is better, but it comes to a point where the screen can be too large. We use the distance between the sitting position and the wall along the desired viewing angle to determine the optimal screen size. If the screen gets too large, the viewer can get neck fatigue with prolonged viewing. Larger private theaters have multiple rows of seating. The screen size and position that is determined by the primary sitting position.
The final piece to a great viewing experience is the right projector. The right projector has a quality lens that can produce a sharp picture at the desired distance, produces bright colors and supports 4K, HDR and 120Hz.
Lighting Control:
Dedicated theaters require some form of lighting control. Most of our theaters have three main lighting modes: all lights on, all lights off, and ambient lighting. The all lights on is used before and after movies to easily navigate the room. The all lights off mode is for maximum immersion. The only glow will be from the picture in front. The ambient lighting mode is somewhere in the middle. The ambient lighting creates a small amount of light that doesn’t disturb the picture, but allows people to move around the room. There are low-brightness lights on stairs and pathways to the exit to let people see where they’re walking if they need to leave mid-movie. Sometimes sconces and other lights are also at low brightness. It’s entirely up to the designer. If you have all your friends over to watch a movie and someone needs to use the restroom, ambient lighting on the steps at a low brightness can help that person get out safely without disrupting everyone else.
The all on and off modes can be triggered from the universal remote. Without lighting control, someone would have to turn off all the lights, go to their seating, and then turn on the private theater.
No Compromise on Aesthetics:
Another critical piece to a high-quality private theater is the aesthetics. The aesthetics pull the entire space together. Earlier, we mentioned all the soundproofing in the walls and ceiling. Even though this is a dedicated theater, this room must look polished. The easiest way to do this is with acoustically transparent fabrics. After installing all the soundproofing, we lay acoustically transparent fabrics on all the surfaces. These fabrics come in many colors and different design styles, allowing your designer to create an aesthetic that fits your style.

The ceiling speakers need a similar treatment. Most ceilings are not covered in fabric. Instead, we use a color-matched grill or a small aperture speaker to minimize the aesthetic impact. Mounting the speakers up in the ceiling does require some additional work. The speakers in the ceiling need a soundproof box to prevent ambient sound from leaking in.
The final part is also hiding the projector. We recess the projector into the wall and only leave a small opening for the light to come through. Just like with speakers, the projector needs a soundproof box and enough ventilation to keep it from overheating.
Advanced System, Easy Control:
Up to this point, we have a beautifully designed home theater space with all the equipment we need to begin watching, but now we need a way to control it all. This is where a home control system comes in. Traditional IR remotes won’t work now that the equipment is in a different room and the projector is behind the viewer. We use these control systems to turn on equipment in the correct sequence every time. That means when you want to start watching, it turns on the projector, lowers the screen if it’s motorized, turns off all the lights, and switches to the correct input.
How To Get Your Theater?
Dedicated theaters are pretty sweet. They offer an A/V experience unlike anything else. For those without a dedicated space, some of our past customers have opted for a hybrid theater. Hybrid theaters transform an ordinary room into a home theater thanks to motorized shades, lowering projectors, and recessed mounted lowering screens. No matter what theater system you want to put in your home, call us at 415-456-7000 for a consultation to help you design your ultimate home theater.